easyPageeasypage.studioeasyDNSOpen page studio →

THE EASYPAGE GUIDE

A parked domain.
A page of your own.

Use your words, images and links to make your domain useful while you decide what comes next.

easyPage.studio is exclusively available to customize parked domains registered via easyDNS. You’ll need access to your easyDNS account and its email inbox. Your domain must be configured to use easyDNS parking to serve your published page.

1. Set up API access

Enable the API

  1. Sign in to your easyDNS account.
  2. Open User → Security and find the REST API section.
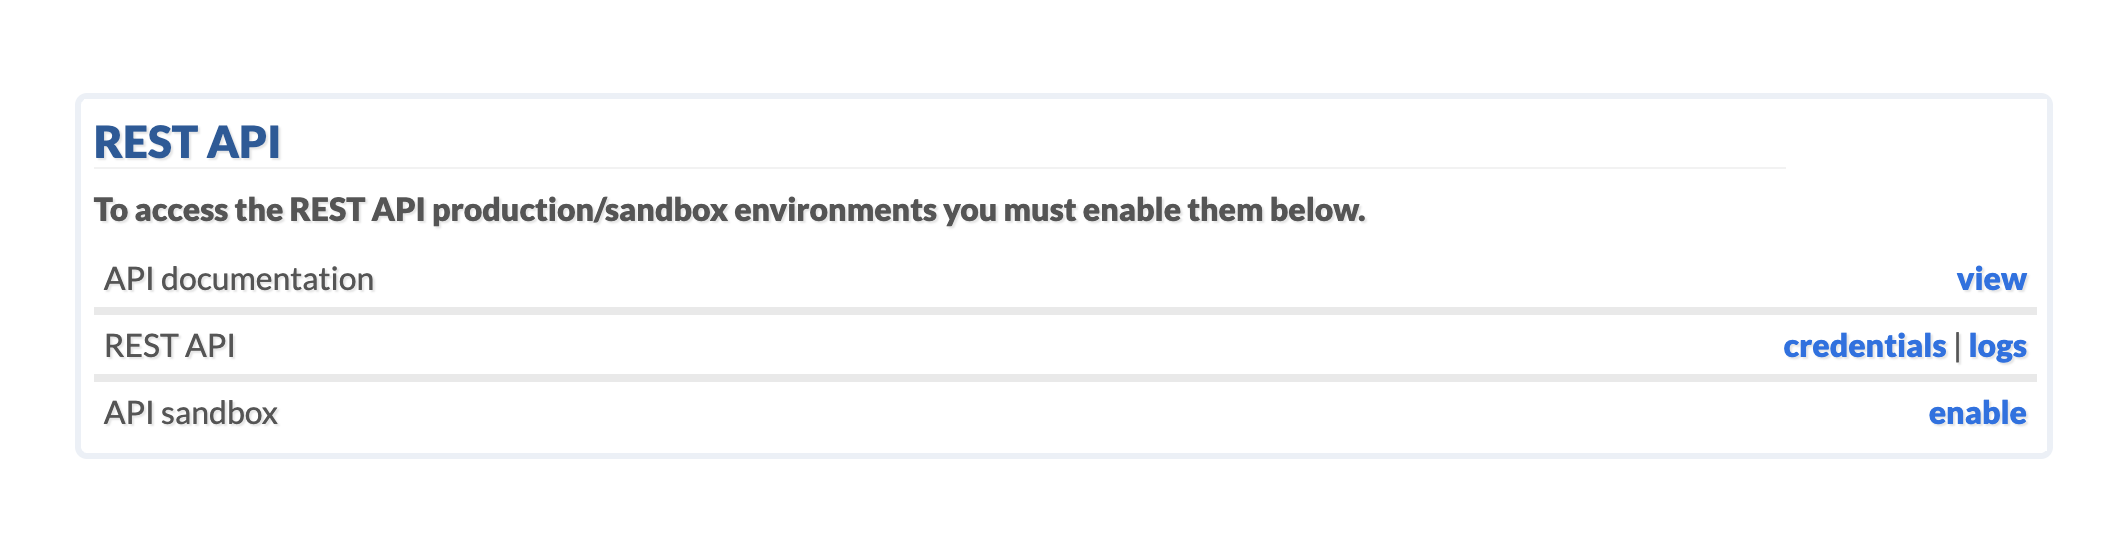
  3. Enable the production REST API. Once enabled, choose credentials to manage your tokens. easyPage uses the production API; enabling the sandbox alone is not enough.
REST API section in easyDNS Security, with credentials and logs links for the enabled REST API and a separate API sandbox option.
The REST API section under User → Security.

Create a token for your parked domain

  1. In API credentials, choose the option to create a new API token.
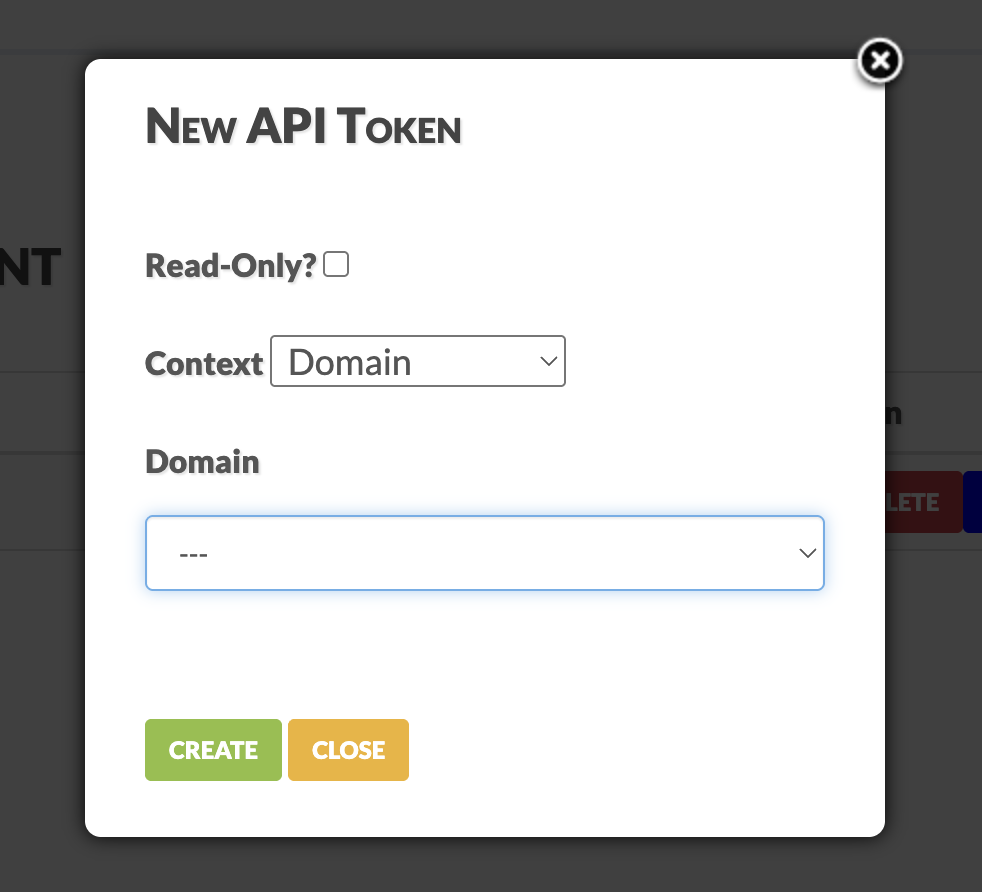
  2. We recommend restricting each token to the single parked domain you’re customizing: select Domain in Context, then select that domain.
  3. Choose Create. Keep the resulting API token name and API key handy for sign-in.
New API Token dialog with Context set to Domain, a domain selector, and a Create button.
Choose Domain as the context and select your parked domain.

2. Sign in to easyPage

  1. Open easyPage.studio and enter your domain, such as example.com, without https:// or a page path.
  2. Enter your easyDNS userid, API token (the token name), and API key.
  3. Complete the verification check and choose Email me a sign-in link. easyPage checks that the account and API credentials have access to the domain.
  4. Check the email address on your easyDNS account, including its spam folder. Open the sign-in link within 10 minutes.
  5. Choose Go to page studio to complete sign-in and open the builder. Each sign-in link can be used once.

Your editing session lasts two hours. Refreshing restores your session and saved server draft. Save changes before refreshing: unsaved edits are not automatically restored. You do not need to re-enter API credentials when publishing during an authenticated session.

3. Choose your page type

Coming Soon / Parked Page

Select Parked Page in the builder. Use it for a coming-soon announcement, a short introduction, a business contact page or a message to visitors.

Add headings, messages, images and links. Where shown, the Show “Coming soon” label checkbox lets you hide that label; some saved pages show a “Welcome” label instead.

Links List / Link Page

Select Link Page for a profile-style page with a banner, optional avatar and a list of links.

Choose platform icons, enter your own link titles and URLs, and reorder rows. Empty link rows don’t appear on the published page. The avatar can use an uploaded image or Gravatar.

Switching page types keeps your content. Link Page adds platform rows and uses your first image as its banner. Check the preview after switching.

4. Add your content

  • Messages: use bold, italic and the Link button. For an email link, use mailto:info@example.com.
  • HTML: the Parked Page message editor accepts paragraphs, line breaks, bold, italic and links. Choose HTML, enter your markup, then Apply HTML. Scripts, styles and arbitrary embedded HTML are not supported.
  • Block order: use the ↑ and ↓ controls to move a message below an image or arrange other content blocks.
  • Images: upload JPEG, PNG or WebP files up to 5 MiB each. Previously uploaded images are available in the media gallery, with a total allowance of 10 MiB per domain.
  • Preview: switch between Desktop and Mobile. While a link is incomplete, the last valid preview stays visible until you finish it.

A simple email link in HTML:

<p>Email us: <a href="mailto:info@example.com">info@example.com</a></p>

5. Save, export and import

Saving keeps a draft. Publishing makes it live. Choose the option that matches what you want to do:

ActionWhat it does
Save server draftSaves your current page to your signed-in domain’s easyPage account. Use this before leaving or refreshing. It does not change the live page.
Load server draftReplaces the editor contents with the last draft saved on the server.
Save local draftSaves a draft in this browser on this device. It is separate from the server draft and may be lost if browser storage is cleared. Local storage holds one easyPage draft at a time, so saving another domain’s draft replaces it.
Load saved draftLoads that browser’s local draft into the editor.
Export draftDownloads an editable JSON backup named easypage-example.com-draft.json, using your current domain. Keep it for later import.
Import draftOpens an exported easyPage JSON draft in the editor, replacing its current contents. Save any work you want to keep first. Import does not save to the server or publish automatically.
Download HTMLDownloads the rendered page as example.com-easypage.html. When signed in and images have loaded, the HTML includes those images. This is a page snapshot, not an editable JSON draft.

Restore an exported draft

  1. Sign in for the domain you want to edit.
  2. Choose Import draft under Keep your work and select your easyPage JSON file.
  3. Review the page, then choose Save server draft to keep it in your account or Publish page to make it live.

6. Publish on your domain

Open Save & publish, expand Publish or unpublish your page, and choose Publish page. This saves the page currently in your editor and publishes that version on your parked domain.

To make changes later, sign in again, edit your saved page and publish it. Unpublish removes the custom page from public service so the default parked page can be served again.

If something doesn’t work

  • Credentials cannot be verified: check that production API access is enabled, the token is scoped to the domain you entered, and you used the correct userid, token name and key in their separate fields.
  • No email: check the inbox associated with your easyDNS account and its spam folder. If verification failed, no email was sent. If the link expired, choose Request another link and sign in again.
  • An image is missing after import: select it from this domain’s media gallery or upload it again. A JSON export does not contain image files.
  • HTML is rejected: use supported formatting and a complete https://, http:// or simple mailto: link. For email, use an anchor such as the example above.
  • Changes aren’t live: saving or exporting alone does not publish. Choose Publish page and check that the domain is set to easyDNS parking.